How to Update Lightroom Classic 2025?
Firstly, you need to go through the system requirements in order to run the latest version of Lightroom Classic. Before upgrading to the new version you need to follow a few instructions listed below:
On Mac:
Go to the top left corner of the Lightroom Classic, Click Lightroom Classic from the menu and click Catalog Settings from the dropdown section.
On Windows:
Go to the bottom menu of Lightroom Classic, Find the same button Catalog Settings
When you open the Catalog Settings, this block will appear:
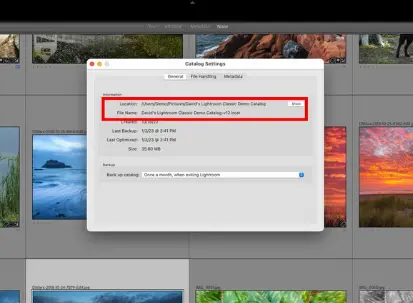
In the highlighted section , you can see the location of your catalog, Note down the path of your Catalog. And then click the Show Button. After which a Block Section will pop up. Make sure you don’t close this window.
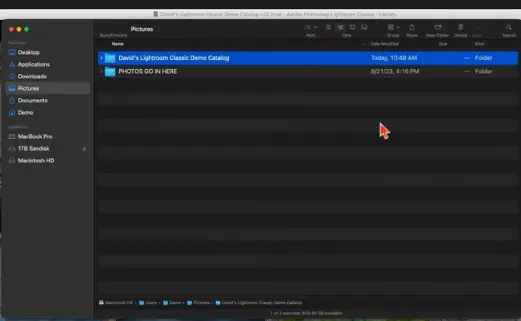
Now close the Lightroom Classic Window.
Steps As How to Update Lightroom Classic
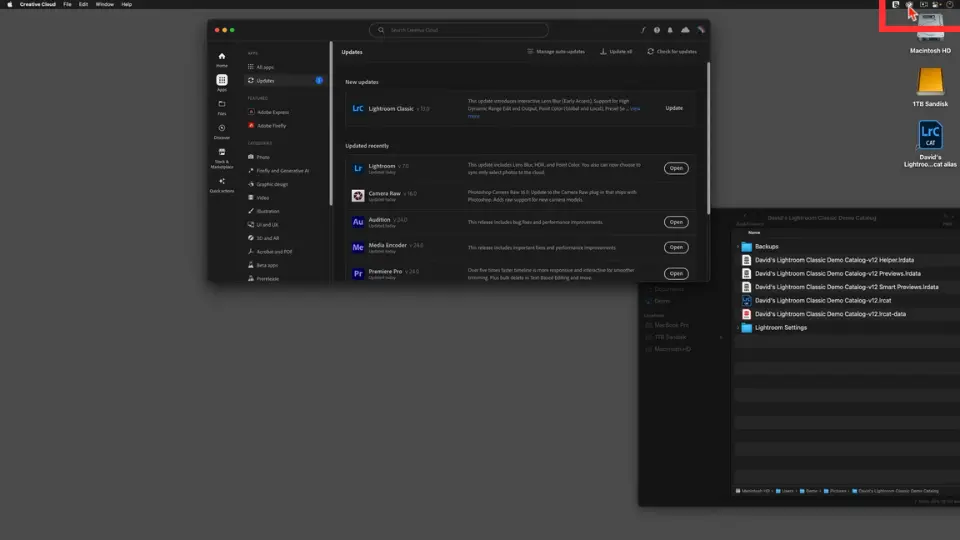
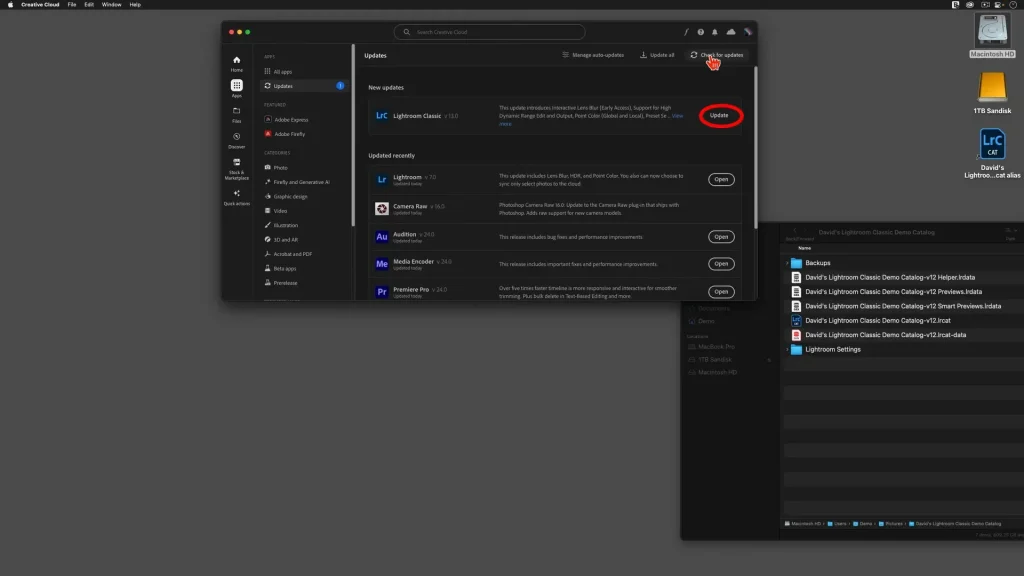
In order to update Lightroom Classic, you need to open Adobe Creative Cloud on your PC. In the top bar, click the option that is in the highlighted in the picture. But Windows user will have the option in the bottom bar of their Creative Cloud App. When you are in the Adobe Creative Cloud, make sure you are signed in. In addition to that, you can also learn what’s new in Lightroom nowadays and a method to export from Lightroom to Instagram
Catalog Upgrade
Now Click the Option “Check For Updates” which will show you all the update regarding Adobe Lightroom Classic and if you find any new update regarding Lightroom Classic it will also be shown there and right in front of the app, there is a button named “Update”. Click on that button and the new version will start to install. When the new version is installed, you need to upgrade your catalog as well because every Lightroom Classic Update has different format of catalog. If you have one Catalog of Lightroom Classic then it’s well and good but if it’s more than one, it’s a bit complex because for more than one catalog you need to upgrade every catalog separately.
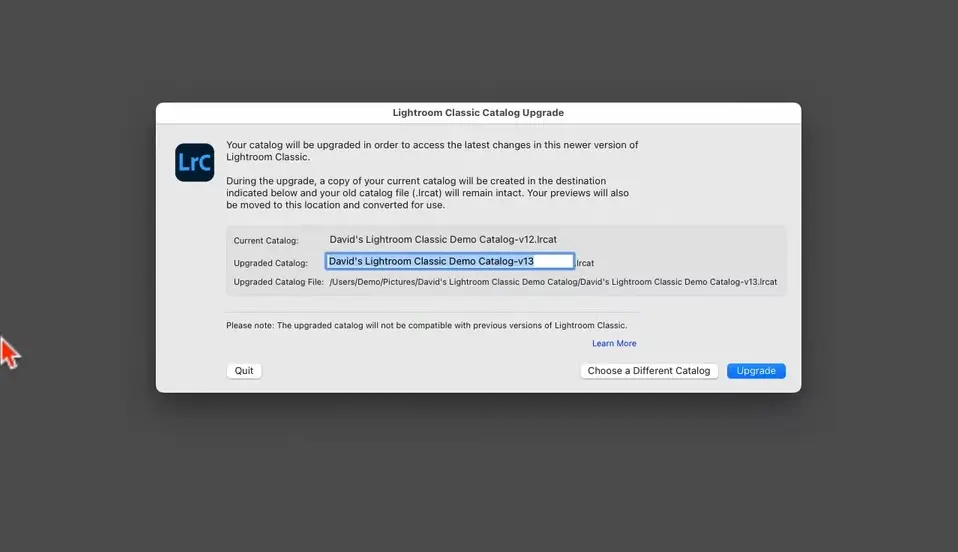
When the installation of new version of Lightroom Classic is done, Click “Open” and then this box will open. The purpose of this box is to confirm whether you are upgrading your Lightroom Catalog to the new version. What you are supposed to do is give it the confirmation that you are upgrading your catalog to the new catalog with the new update of Lightroom Classic.
In the end of the name of your catalog, it will replace the old version name with the new one. Also keep in mind that you catalog will be duplicated and the older catalog will remain intact. Now click the button “Upgrade” and it will take some time if you have a large catalog.
Here the process doesn’t complete. You need to delete the extra files as well which was left behind after the upgrade. Now let’s see how to find those files. Go to the “Catalog Settings” in the menu. A box will appear which we have seen earlier. Now go to General from the menu of the box. Click “Show” button. You’ll see 2 separate .lrcat files of old version. Put them in the Backups folder. the reason of there being so is that in case you ever need those files so that you can access them.
Moreover you will have old version helper data that end with the old version name .lrcat-data. But make sure you don’t delete the files that have the name of the new version in the end.
Now you are good to go. Your Lightroom Classic as well as your Catalog has been updated to a new and latest version. If you want to know how to add watermark in Lightroom and how to export from lightroom to Instagram, we have come up with all the process in easy ways.


