
What is Soft Proofing in Lightroom?
Soft Proofing is a tool which helps in pointing out the colors that are not being shown in the picture which is quite a magic tool. This tool comes in when there is a differentiation of colors when you see a picture in your mobile and then see it on your computer or somewhere else. It actually happens and you have to put up with such a change in your picture.
It has happened to me a lot of times as well that I posted the picture on Instagram or Facebook and there was a huge difference of colors between the real picture that I edited in Lightroom and when I posted that picture on Social Media. Moreover, this also happens when you print a picture and the colors that aren’t displayed in the paper are also highlighted.
How can you enable Soft Proofing in Lightroom?
You can go to the Develop option in the top bar and press the letter “s” from your keyboard or in the bottom you can see whether the Soft Proofing is enabled. The highlighted colors in the picture are the colors that are not displayed in the picture so it doesn’t mean that this is the Highlight Tool of Lightroom Apk.

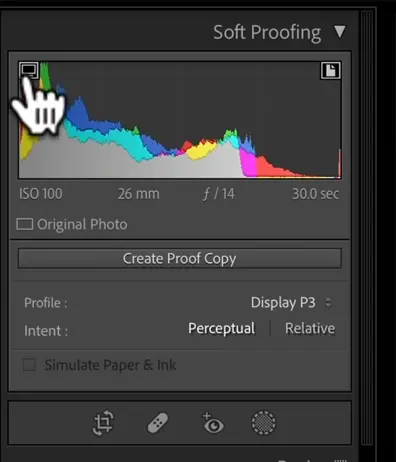
Below in the picture there is a cursor of the mouse on the top left corner of the Soft Proofing Tool. On clicking this button, the image in the Lightroom will start showing the blue colors in the image. Now, wherever you see the blue highlighted colors the in the picture, it means that your PC is unable to reproduce those colors exactly the way they are.
Below in the picture there is a cursor of the mouse on the top right corner of the Soft Proofing Tool. On clicking this button, the image in the Lightroom will start showing the red colors which indicate that the rendering capabilities of the printer is unable to reproduce those colors of the image.
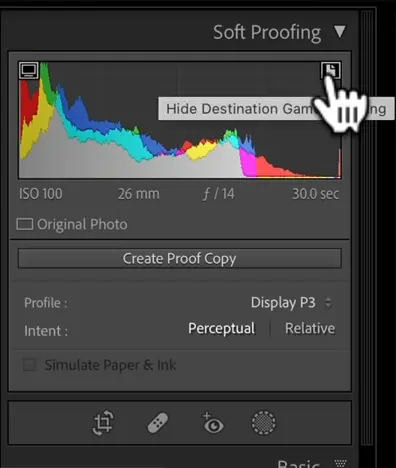
Note: If there is a Magenta color in the picture, it means that both the PC and the printer are unable to produce the exact colors.
Explore More of Printers
If anybody operates Lightroom APK on PC from RGB Monitor, less colors will not be displayed. But Soft proofing in Lightroom is mostly used for printing images. As a mater of fact, every printer possesses a diversity which distinguishes each printer with the other one. So is the case with the type of the paper.
In order to avoid the color problems, you need to contact the manufacturer of the the paper you are using.
Why do we need to contact the Manufacturer?
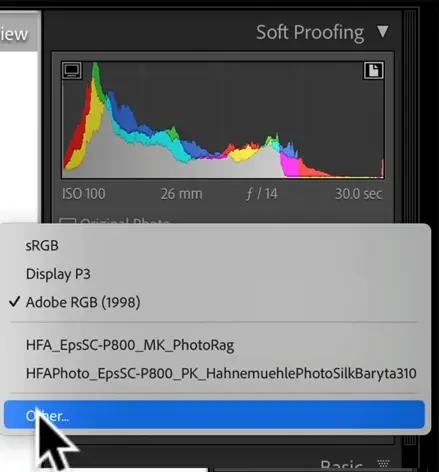
Because in the website of every manufacturer of the paper, there is a specific section to download ICC Profile. For example, Canon and Epson, both have different ICC Profile.

Conclusion
The process is a little bit complicated but it’s quite amazing that how a minute things that look not so important initially can play a huge role. In this case, a few changes by the soft proofing the image can give you amazing results by the color adjustments of the image and if not this you have alternative to make a little changes from the palate and expunge all the flaws from the image. You can also try out as how to add watermark in your picture or the Lightroom mod APK to make the most of the free premium features of the App.


