Tools to Blur Background in Lightroom
There’s no specific or one-click tool like other photo editors to blur the background in Lightroom, but we can use simple tools, such as the Brush, Linear, and Radial Gradient tools, to blur the background in Lightroom.
We can blur the background of pictures in Lightroom Classic, Mobile, and Desktop. So, in this article, we discuss the step-by-step instructions to make it easier for you to learn this!
Step-by-Step Instructions
If you’re worried about the boring backgrounds of your images and want to make them excellent with blurred backgrounds, Follow some simple steps below:
Step 1: Open Lightroom and Select-Object
- Open the Lightroom photo editor.
- Click on the Library Module, select the picture you want to edit, and import it.
- After importing the picture, click on the Develop Module to start editing.
- Find the Add New Mask in the Develop Module, and tap on Select Subject under the Add New Mask.
- This software selects the object automatically.
Step 2: Blurring Tools
Adobe Lightroom allows photographers to blur the backgrounds of their pictures using three tools, such as:
- Brush
- Linear Gradient
- Radial Gradient
To find these tools, tap the Mask Icon at the top right of your screen under the “Histogram.” Next, click on any tools you want to use it. Here’s the complete guide to all blurring tools.
Brush
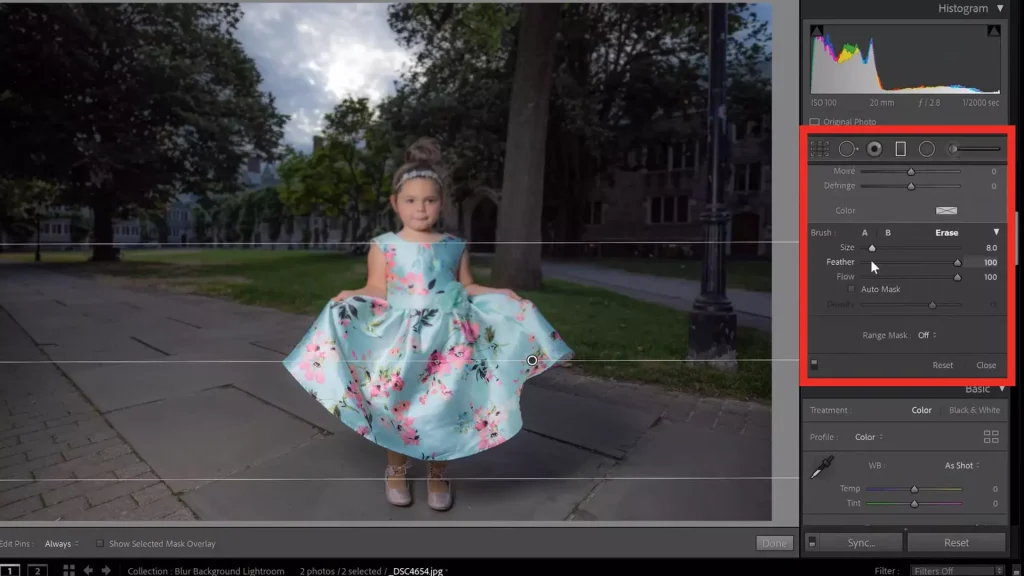
- Step 1: Tap on the Brush tool in the toolbar.
- Step 2: Click on Effect to set the Value of Clarity and Sharpness.
- Step 3: Clarity and Sharpness values should be -50 to -100.
- Step 4: Now, customize the brush size, feather, flow, and density according to the area you want to blur.
- Step 5: Now, apply the brush to the picture’s background.
- Step 6: Ensure that the brush is not applied to the subject.
Linear Gradient
This tool is best for photos with a landscape background. Here’s the step-by-step guide for this tool.
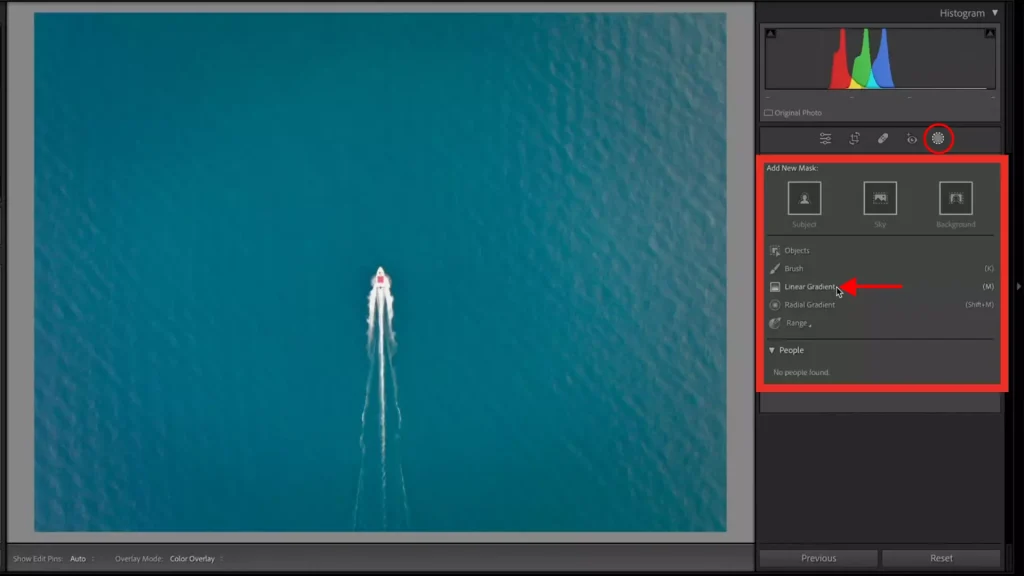
- Step 1: Tap on the Linear Gradient tool in the toolbar.
- Step 2: Create a line in the background area of the photo that you want to blur.
- Step 3: You see a red overlay on the selected area of the image.
- Step 4: Customize the line size, feather, and position according to your needs.
- Step 5: Click on “Effect” and reduce the values of “Clarity” and “Sharpness.”
- Step 6: Clarity and Sharpness values should be “-50 to -100.”
- Step 7: Adjust the setting to get the appropriate level of background blurring.
You may need to draw multiple linear gradient lines to cover the background area of the picture. To get the desired level of blurring, adjust the value of “Clarity and Sharpness.” It’s better to start with the negative value and adjust it to between -50 and -100 to achieve the required effect.
Radial Gradient
This tool is best for photos with the subject in the middle of the frame, such as Portrait. Here’s the step-by-step guide for this tool.
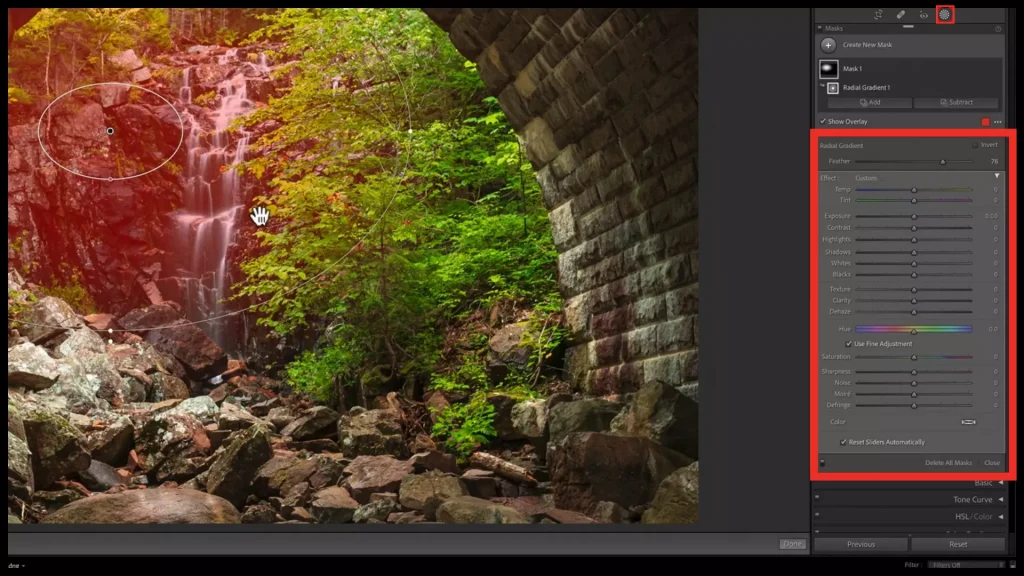
- Step 1: Tap on the Radial Gradient tool in the toolbar.
- Step 2: Create a circle in the background area of the photo around the subject that you want to blur.
- Step 3: You see a red overlay on the selected area of the image.
- Step 4: Customize the circle size, feather, and position according to your needs.
- Step 5: Click on “Effect” and reduce the values of “Clarity” and “Sharpness.”
- Step 6: Clarity and Sharpness values should be “-50 to -100.”
- Step 7: Adjust the setting to get the appropriate level of background blurring.
Step 3: Exporting the Edit Images
- Select the image you want to explore.
- Tap on the Export button, and a new window box will appear on your screen where you can set the export settings, such as Export Location, File Naming, Video, and File Settings.
- Click on the export button after configuring the export settings.
- Your image has been exported to the specified location.
Blur Background in Lightroom Mobile
- Import the picture in Lightroom or capture the picture using Lightroom’s camera.
- Click on the “+” icon.
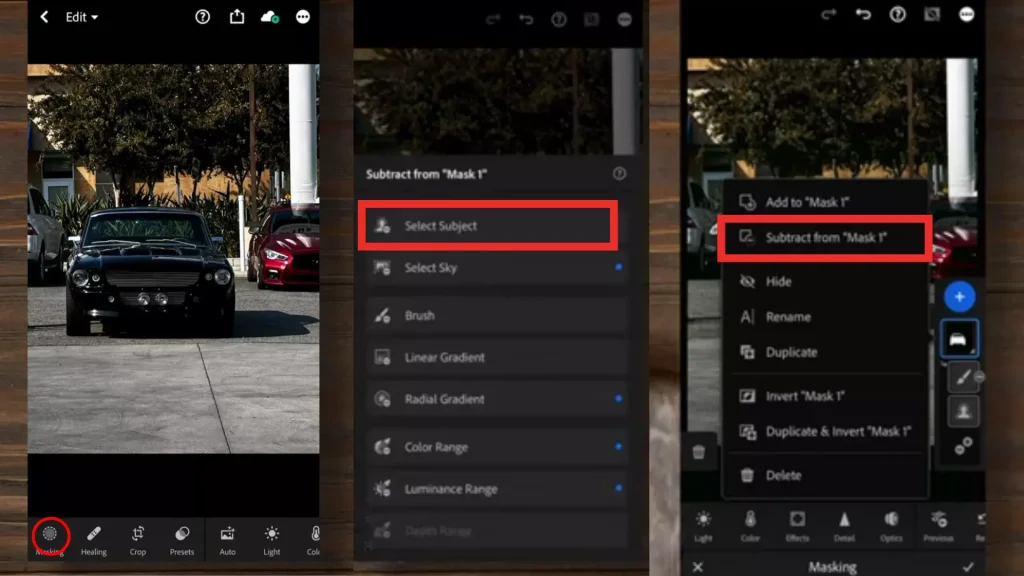
- Choose a Brush, Linear Gradient, or Radial Gradient filter suited to your edits.
- Select the Mask area you want to blur.
- Scroll to the Menu and find the slider section.
- After finding the section, adjust the clarity and sharpness to blur the background.
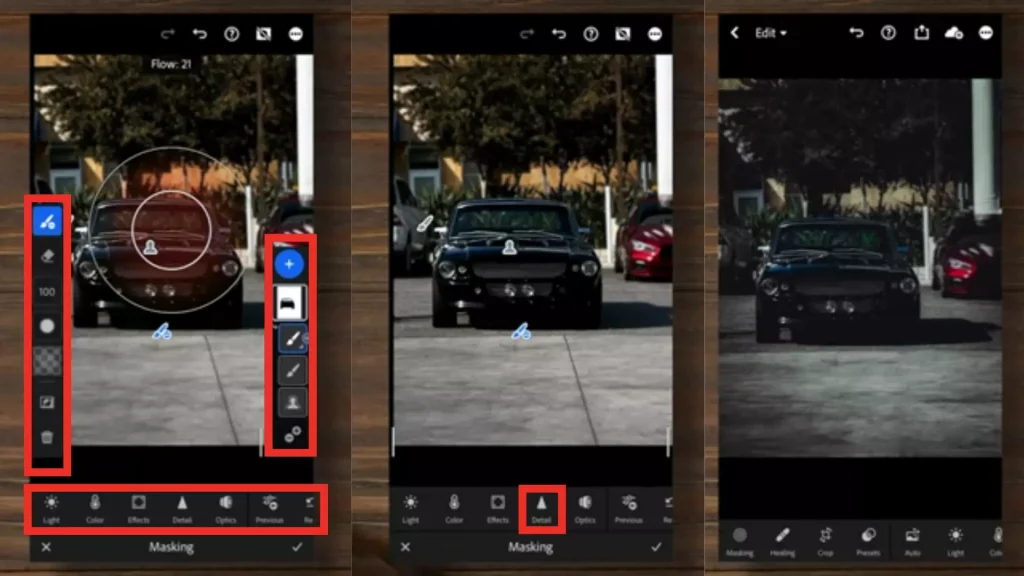
- Once you’ve done all the settings, you’ll be satisfied with the edits. You can save and share your image.
Extra Tips
You can get the natural effect of blur background in Lightroom and make the professional polish look by following extra tips:
- Select the right photo to get the best blurring effects.
- A clear difference should be between background and subject.
- Start by choosing low feather settings and increasing them gradually.
- Adjust the density setting to control the brush’s capacity for a natural blur effect.
- Use the auto mask feature to blur background in Lightroom; it automatically applies to the Mask to deduct the subject edges. The Auto Mask tool is in the brush adjustment panel.
- You can use the preset to blur background in Lightroom. It ensures consistency and saves time.
Conclusion
Photographers can easily complete their Blurring Background tasks using Adobe Lightroom and make their edits professional. We discussed the three easiest ways in the upper section, and you can blur the background of your pictures perfectly using these tools. So, blur the background in Adobe Lightroom.
Frequently Asked Questions(FAQs)

