Lightroom Shortcut Keys
Here’s a list of Lightroom keyboard shortcuts and how photo editors can use these shortcuts for which purpose.
1- Show/Hide all Panels
2- Auto Tone
3- Undo
4- Show/Hide Filter Bar in Library Module
5- Enter Grid View in the Library Module
6- Enter the Develop Module
7- Auto White Balance
8- Crop Tool
9- Black & White Tool
10- Lights Out Tool
11- Brush Masking Tool
12- Radial Gradient Tool
13- Spot Removal
14- Flag Photo
15- Star Rating
Special Note: Control and Command are the same; Ctrl is used for PC, and Command is used for Mac.
1: Show/Hide all Panels
| Lightroom’s Shortcut Key | Window | MacOS |
| Show/Hide all Panels | Shift+Tab | Shift+Tab |
If photo editors want to use a large screen for editing and hide all panels, they must try this quick and easy shortcut key to speed up their workflow. This shortcut key hides/shows all panels and toolbars from the screen; it also removes the noise from the screen and provides a large workspace for photo editors to do their work professionally.
2: Auto Tone
| Lightroom’s Shortcut Key | Window | MacOS |
| Auto Tone | Ctrl+U | Command+U |
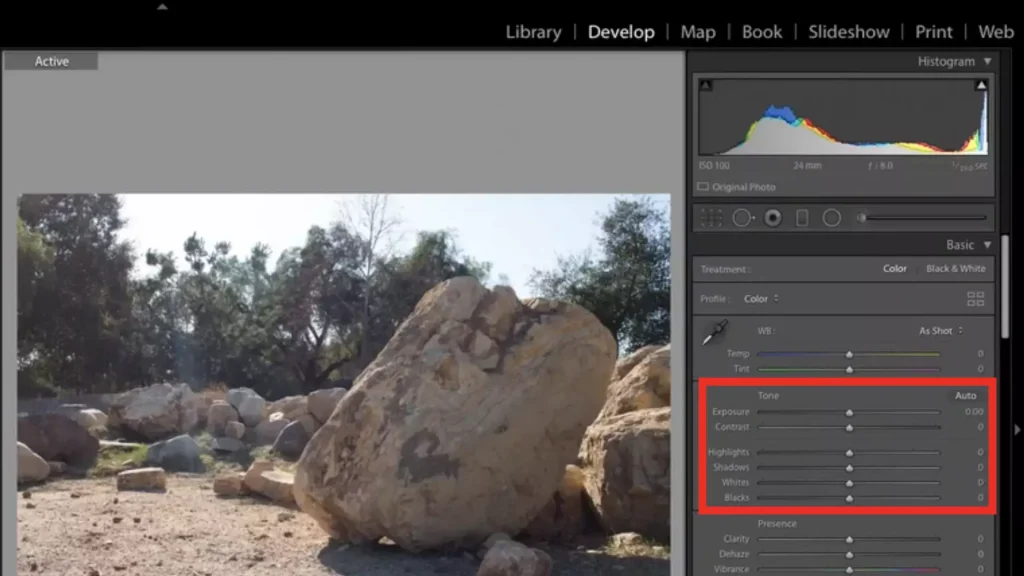
Photo editors can use this shortcut key to set their image tone automatically. This shortcut key is most helpful for the editors to automatically set their image Exposure, Contrast, Highlights, Shadow, and White and black. Press Ctrl+U or Command+U on the Lightroom keyboard to quickly set the image’s Auto Tone. If editors don’t like this setting, they can easily undo this.
3: Undo
| Lightroom’s Shortcut Key | Window | MacOS |
| Undo | Ctrl+Z | Command+Z |
Photo editors can easily undo their changes and edits if they’re unsatisfied with them. To do this, they need to go to the Edit Tab and click on Undo; that’s a lengthy process, but they can easily Undo this using the Ctrl+Z or Command+Z shortcut key and save time.
4: Show/Hide Filter Bar in Library Module
| Lightroom’s Shortcut Key | Window | MacOS |
| Show/Hide Filter Bar | \ | \ |
Photo editors can use this shortcut key to show/hide the filter bar in Adobe Lightroom’s library module. This filter bar is placed at the top of the image grid, and photographers can use it to search and sort their images by rating, color, metadata, and text.
5: Enter Grid View in the Library Module
| Lightroom’s Shortcut Key | Window | MacOS |
| Enter Grid View | G | G |
Photo editors can use this G shortcut key to bring the grid view to the library module. This feature is one of Lightroom’s most useful shortcut keys because it makes editing easier. Navigating becomes easier when editors bring up the grid view on their screen.
6: Enter the Develop Module
| Lightroom’s Shortcut Key | Window | MacOS |
| Enter Develop Module | D | D |
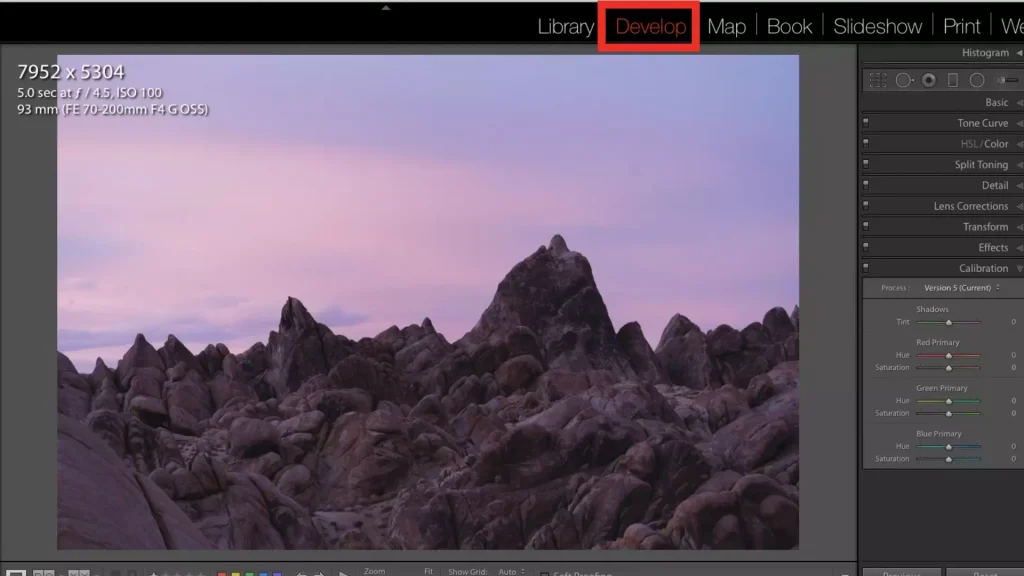
Photo editors use different modules to edit pictures; if they work on the library module and want to go on to the Develop Module for editing, they can use this easiest shortcut key to open their image quickly on the Develop Module. It’s faster than the traditional method to navigate the develop module and click on it.
7: Auto White Balance
| Lightroom’s Shortcut Key | Window | MacOS |
| Auto White Balance | Ctrl+Shift+U | Command+Shift+U |
If photo editors need to adjust the picture’s white balance, they just press the shortcut key Ctrl+Shift+U, and the white balance will be adjusted automatically. If unsatisfied with these actions, they can Undo changes using the shortcut Ctrl+Z.
8: Crop Tool
| Lightroom’s Shortcut Key | Window | MacOS |
| Crop Tool | R | R |
If photo editors need to crop the image during editing, they can use another common technique. Press R to open the crop tool, which speeds up their editing work. Editors can rotate their editing pictures and so on. If they want to deactivate the tool, press R again and deactivate the tool. The Crop & Straighten tool is always used; remember this short key to make yourself easier.
9: Black & White Tool
| Lightroom’s Shortcut Key | Window | MacOS |
| Black & White tool | V | V |
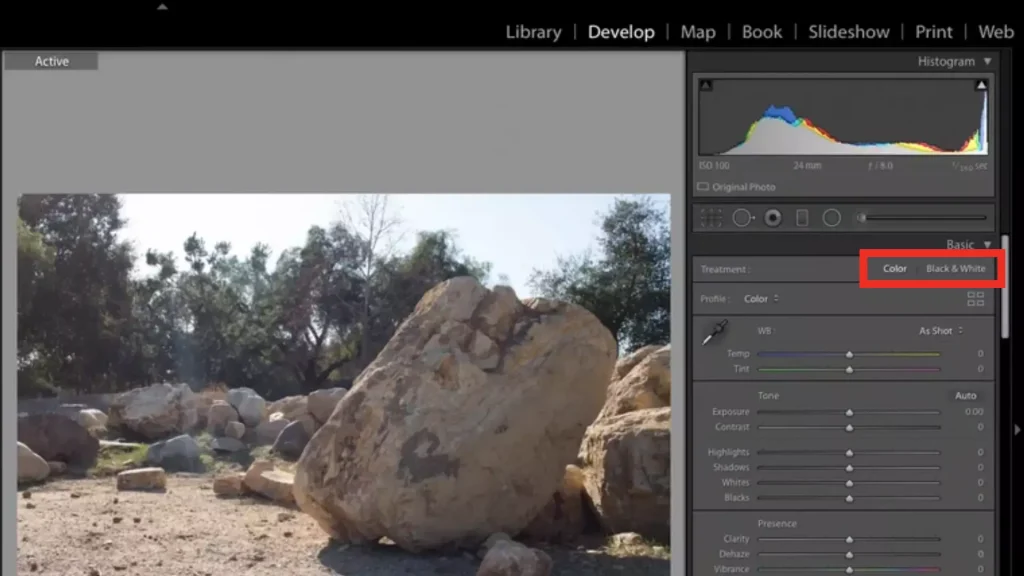
Sometimes, photo editors need to see their image in grayscale or Black & White mood during the editing. To do this, editors need to go into the develop module and click on the Black & White tool, which is a long process. Photo editors press the V short key to see their editing image in grayscale and press V again to move back to see their color image. This shortcut key is most helpful in saving time.
10: Lights Out Tool
| Lightroom’s Shortcut Key | Window | MacOS |
| Lights Out tool | L | L |
This shortcut key is best because it works on both modules (Library and Develop). Photo editors can continue editing and make adjustments using the Lights Out feature. Photo editors press the L short key to use this feature; when the editors press L, everything will be dark and see the object 90%, but when editors press L again, everything will go black; just the object will be seen on the screen.
11: Brush Masking Tool
| Lightroom’s Shortcut Key | Window | MacOS |
| Brush Masking Tool | K | K |
The Brush Masking tool is the most useful tool for developing modules. Photo editors must repeatedly open this tool to ensure their editing is perfect. They can press K to open the Brush Masking tool quickly for adjustment and press K again to close this tool.
12: Radial Gradient Tool
| Lightroom’s Shortcut Key | Window | MacOS |
| Radial Gradient tool | Shift+M | Shift+M |
The Radial Gradient and Linear Gradient filters are the same, and the same shortcut key is used. Photo editors use the Shift+M shortcut key to quickly open the Radial & Linear Gradient Tool. Press this short key again to close this tool.
13: Spot Removal
| Lightroom’s Shortcut Key | Window | MacOS |
| Spot Removal | Q | Q |
Spot Removal tool mostly used when the editors edit the skin tone. Editors can open this tool by pressing Q and closing it to press this shortcut key again.
14: Flag Photo
| Lightroom’s Shortcut Key | Window | MacOS |
| Flag Photo | P | P |
Sometimes, photo editors must select some pictures to sort them as a favorite. This shortcut key allows photo editors to select and flag their best images. To do this, editors just need to press P, and they can see their favorite images in the flagged photos.
15: Star Rating
| Lightroom’s Shortcut Key | Window | MacOS |
| Star Rating | 1-5 | 1-5 |
The Star Rating feature is used to pick up and organize favorite pictures. Photo editors can rate their pictures using a 1-5 scale. Press 1 for a one-star rate, press 2 for a two-star rate, press 3 for a three-star rate, press 4 for a four-star rate, and press 5 for a five-star rate. Photo editors can use this filter in any module to show the rated images.
Lightroom’s Shortcuts Final Words
In this blog, we discussed unique information about Adobe Lightroom shortcuts, and you have learned some unique things to make your editing easy and fast. You need to apply these shortcuts to yourself for better understanding.

